
The allure of DIY electronics lies in the ability for one to bring their very own innovative ideas to life. Whether you’re just stepping into the realm of electronics engineering or a seasoned hobbyist looking to tackle more interesting projects, this guide will walk you through the essentials of creating electronic projects. You will learn about the simplest electronic components necessary to build a functioning circuit, get tips on sourcing electronic parts, and become familiar with the tools you will need. By the end of this article, you’ll be equipped with the knowledge to start designing and assembling your very own electronic devices.
Diving Into the World of Electronics
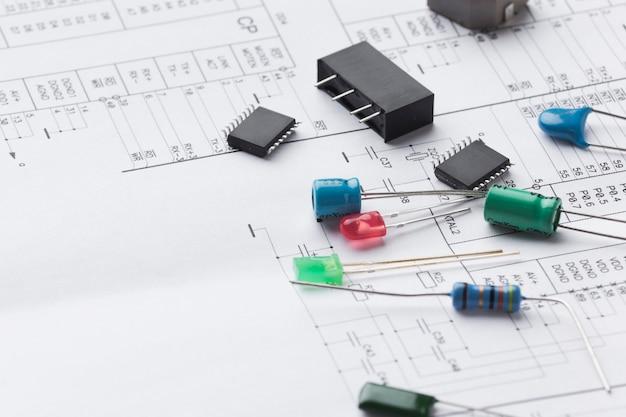
The backbone of any electronic structure is its components. Common electronic components include resistors, capacitors, diodes, and transistors. Resistors control the flow of current, capacitors store and release electricity, diodes ensure current flows in one direction, and transistors act as switches or amplifiers. These are the building blocks that, when combined, create a multitude of devices and circuits, each with endless possibilities in DIY projects. Having a strong grasp on these basics is crucial for anyone interested in electronics projects.
The Essential Tools for Electronics Hobbyists
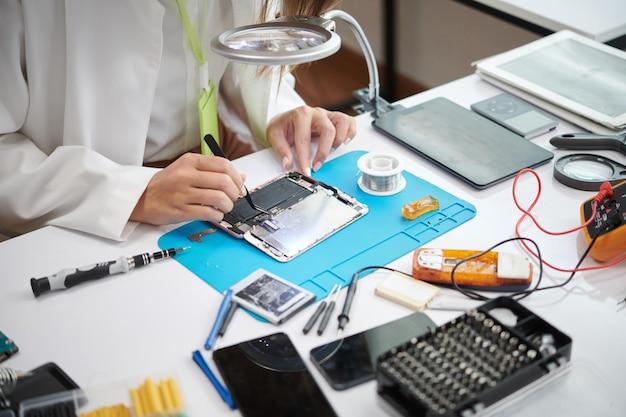
As with any craft, the right tools are essential for success. For electronics, the essentials include a soldering iron, wire strippers, a digital multimeter, and a breadboard for prototyping circuits. Additionally, precision tweezers, flush cutters, and a magnifying glass can also make delicate tasks more manageable. These tools are the bedrock of constructing and testing your electronic projects, and having them on hand will make the process smoother and more enjoyable.
Decoding Circuit Diagrams: A Beginner’s Guide
Circuit diagrams are the language of electronics, depicting how components connect and interact. Reading circuit diagrams involves recognizing symbols and understanding how lines illustrate the connections between electronic parts. It is a skill that might seem daunting at first, but with practice, you will become fluent in interpreting and creating your own designs, an invaluable step towards DIY mastery.
Step-by-Step Guide to Making Your First Electronic Project
One of the simplest electronic projects to start with is an LED flasher circuit. It’s a fundamental project that teaches you about timing, power delivery, and basic wiring. Once comfortable, you could also venture into projects involving sound, like a simple electronic keyboard, and gradually progress to more complex designs incorporating sensors or even microcontrollers for automation and control.
Sourcing Your Components: Tips and Best Practices
Finding the right components can often be a project in itself. Creating a list of needed materials and their specifications helps. Electronics stores and online vendors usually provide a wide range of components. When choosing a supplier, consider factors such as price, availability, and shipping times. Read on to see a table listing common electronic parts and their applications in DIY projects.
| Component | Application |
|---|---|
| Resistors | Current limiting, voltage division |
| Capacitors | Timing circuits, filters, power smoothing |
| Diodes | Power rectification, signal demodulation |
| Transistors | Switching, amplification, oscillation |
| LEDs | Indicators, lighting |
| Integrated Circuits (ICs) | Complex functions such as timers, microcontrollers |
Assembling Your Electronics Project: A Walkthrough
Once you have your design laid out and components secured, it’s time to assemble. Start by laying out components on the breadboard, which is a great tool for creating temporary circuits without soldering. Make the connections as per your diagram, double-checking each wire and connection. If you’re ready for a more permanent build, transfer your design to a printed circuit board (PCB) and solder the parts in place, taking care to ensure a good, clean solder joint for reliable operation.
Troubleshooting Common Issues in Electronic Projects
In DIY electronics, issues will arise. Common setbacks include incorrect wiring, faulty components, and overheated parts. To avoid problems, always double-check connections against your circuit diagram before powering up, inspect components for damage, and ensure your solder joints are solid. Keep your workspace organized to prevent any accidental shorts or losses of small parts.
Debugging Techniques for Your Electronics Projects
When faced with a non-functioning circuit, the multimeter is your best friend. Begin by checking for continuity within your circuit. If that checks out, move on to measuring voltages and currents at various points to locate where the failure might be. If you’re using Arduino or a similar platform, ensure your code has no errors and that it’s uploaded correctly. Consider reviewing online forums or documentation; many might have encountered and solved similar issues.
Enhancing Your Electronic Projects
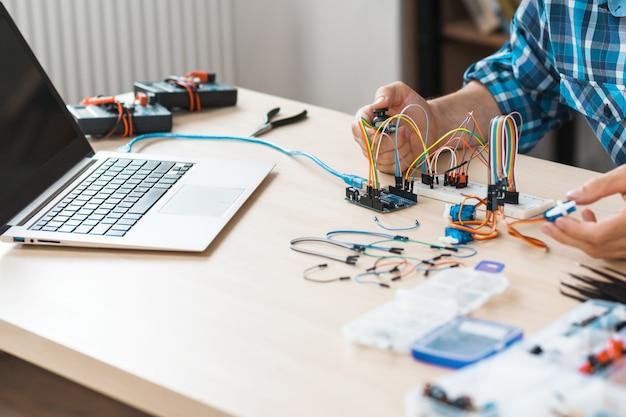
When you’re comfortable with basic circuits, incorporating a microcontroller like an Arduino can dramatically expand your project’s capabilities. Microcontrollers allow you to include programming logic to your electronics, enabling them to interact with sensors, control motors, and more. The Arduino platform, in particular, is a great starting point for those new to programming electronics due to its user-friendly interface and supportive community.
Adding Interactivity with Sensors and Actuators
Electronics become truly interesting when they can interact with their environment. Sensors enable your projects to detect changes such as light, temperature, motion, and sound, while actuators allow them to move or control other devices. Implementing these elements can make your projects much more dynamic and responsive, giving you a taste of what’s possible in the world of electronics engineering.
Showcasing Your Electronic Creations
Once your project is complete, documenting it is a great way to reflect on your work and share your knowledge with others. Write down your process, challenges you faced, and how you overcame them. Make sure to include schematics, parts lists, and code snippets to provide a comprehensive understanding for those wanting to follow in your footsteps.
Sharing Your Work with the DIY Community
There are numerous online platforms where you can present your finished projects. Platforms like Instructables, Hackster.io, and GitHub are perfect for showcasing your work, getting feedback, and connecting with other enthusiasts. Participating in online communities is not just about showing off your work, but also about contributing to the cumulative knowledge and inspiration that fuels the DIY electronics scene.
Conclusion
With the insights provided in this article, you’re now equipped to embark on your journey of creating innovative electronic projects. Remember that patience, persistence, and practice are key to refining your skills. Whether you aim to develop a simple LED blinker or a complex home automation system, the rewards of completing a project are immense, from the acquired technical knowledge to the satisfaction of problem-solving. With each project, you’ll gain confidence and be inspired to push the boundaries of what’s possible in the realm of DIY electronics.
FAQs
1. What are some good electronics projects for beginners?
A beginner can start with simple projects like making a blinking LED circuit, creating a battery-powered fan, or constructing a basic alarm system. These projects help to understand fundamental concepts while keeping complexity at a manageable level.
2. Do I need to have programming skills to make electronic projects?
Not all electronic projects require programming skills. However, incorporating microcontrollers such as Arduino or Raspberry Pi into your projects will require some basic coding. There are numerous resources online to help beginners learn programming for electronics.
3. Where is the best place to find electronic components for my projects?
Electronic components can be sourced from local electronics stores, online retailers, or marketplaces specifically catering to electronics hobbyists. Sometimes, you can salvage components from old or discarded electronic devices.
4. How do I know if my electronic project is safe to use?
Always follow safety guidelines, use components within their specified ratings, and test your project for short circuits or design flaws using a multimeter. Also, make sure to understand battery safety if your project is battery-powered.
5. How can I share my completed electronic project with others?
You can share your project by writing a blog post, creating a video tutorial, or posting on forums and social media groups dedicated to electronics. Be sure to include pictures, schematics, and code snippets to help others learn from your project.